Web App Trigger
This trigger is only available in the Smithy SaaS.
The Web App trigger is the simplest way to set up a workflow if you are trying to scan websites and webapps. When you add this trigger to your workflow, a noop-target component is added automatically behind the scenes. Then a tool like the Zap scanner can run on the websites you requested. The Zap scanner has to be configured to take data from the trigger (read below).
Parameters are then populated by the trigger with every run. If you are scanning a public website, you don't need to supply a login_url, username or password.
One trigger can target multiple web apps. If it does, each website is a separate target and will launch a separate run.
This trigger can only be launched manually.
Global component settings
Go to the /integrations page and find the Zaproxy component. You need to set it up with the following settings:
Login URL: {{ .context.trigger.event.login_path }}
Target:    {{ .context.trigger.event.url }}
Username:  {{ .context.trigger.auth.username }}
Password:  {{ .context.trigger.auth.token }}
UI Settings
You can add multiple of these:
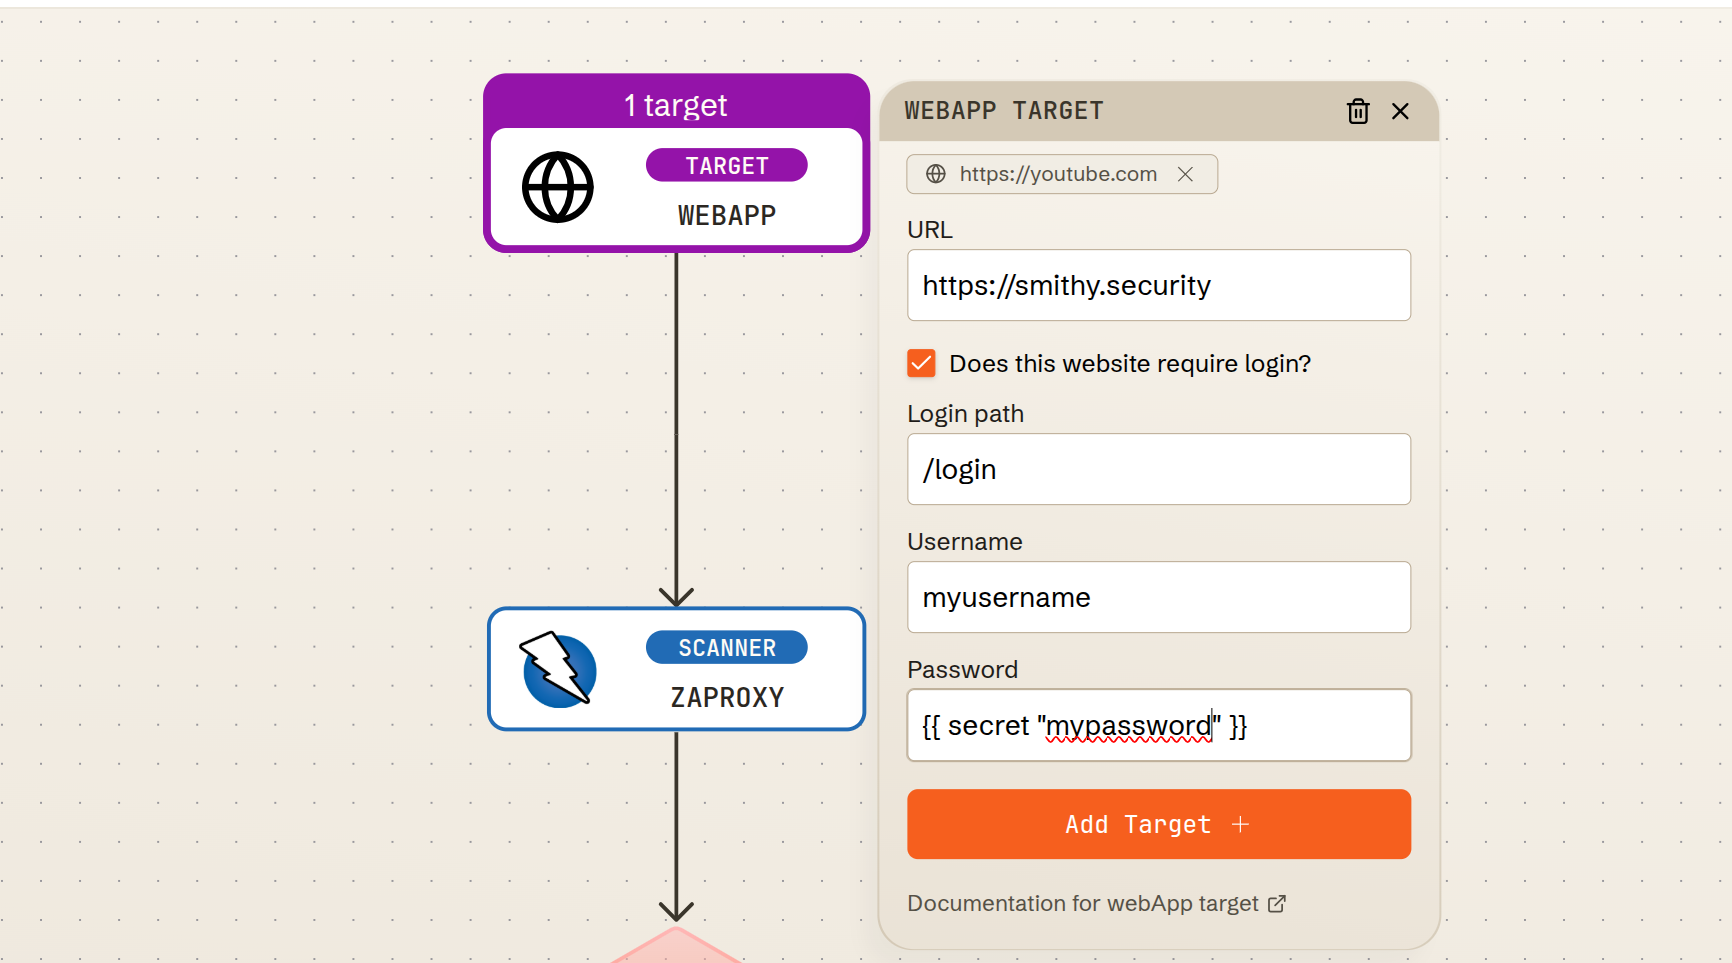
URL: The HTTP or HTTPS URL of a web app.
Login URL: The path of the login page.
Username: Username for the website.
Password: Password for the website.
You can use a templated password, with the template format
{{ secret "MY_PASSWORD"}}. Passwords are managed in Settings > Secrets.
Here is what the trigger looks like when you set it up correctly:
Running the workflow
To run a workflow with this trigger, press "Launch Workflow" on the workflow page. You will get a choice of which target webapps you want to scan. Then each selected target will launch into its own Run.